
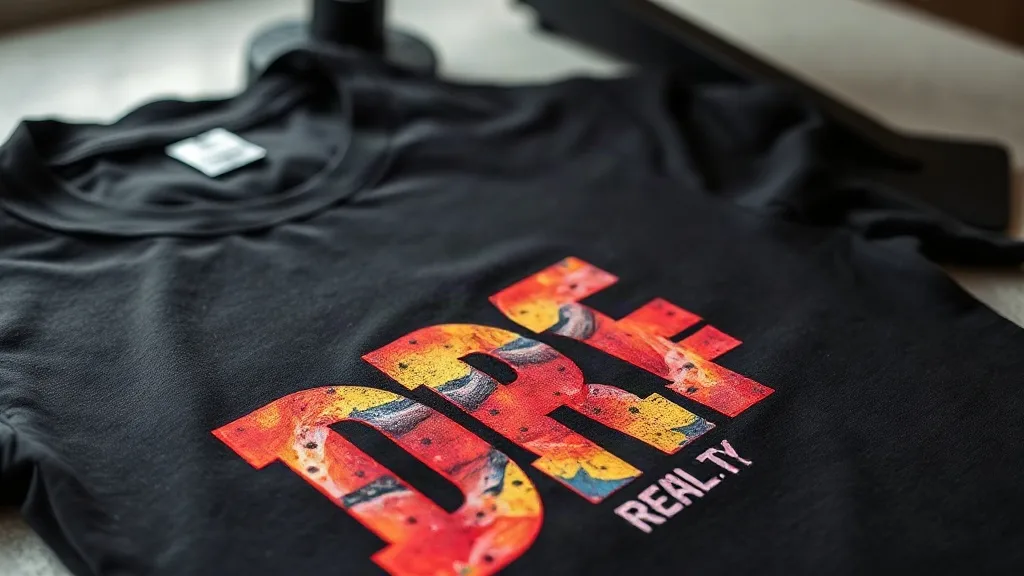
Printing on dark garments has always been a challenge for apparel decorators. Whether you're working with black tees, navy hoodies, or deep burgundy sweatshirts, achieving bright, opaque graphics without a heavy hand can feel like a constant battle. That's where dtf transfers come into play. This guide dives deep into the nuances of using dtf technology on dark fabrics, offering practical advice from real-world shop experience to help you produce stunning, long-lasting results.
Why DTF Transfers Excel on Dark Garments
DTF (Direct to Film) printing has revolutionized the way we decorate dark apparel. Unlike screen printing, which often requires a white underbase and multiple passes, DTF transfers are printed on a special film with a white ink layer that sits beneath the color inks. This white layer acts as a foundation, allowing colors to pop vividly even on the darkest fabrics. The result is a soft-hand print with excellent opacity and detail, without the need for time-consuming setup or cleanup.
Moreover, DTF transfers adhere well to a wide range of materials, including cotton, polyester, blends, and even nylon. This versatility makes them ideal for dark garments that might otherwise be difficult to decorate with other methods. Whether you're printing a one-off custom piece or a bulk order, DTF offers consistency and reliability.
Preparing Your Artwork for Dark Garments
Getting great results with DTF on dark shirts starts with proper artwork preparation. Since the white ink layer is crucial for opacity, you need to ensure your design file is set up correctly. Here are key steps:
- Use a transparent background: Save your design as a PNG with a transparent background so the DTF printer knows where to place the white ink.
- Include a white underbase: In your design software, create a separate spot color layer for white. This tells the printer to lay down white ink behind all colored elements.
- Check for thin lines and small text: Very fine details may not hold up well on dark fabrics because the white underbase can cause slight spreading. Use a minimum line weight of 1pt and avoid fonts smaller than 8pt.
- Adjust colors for vibrancy: Colors may appear slightly muted on dark backgrounds due to the white layer. Consider boosting saturation slightly in your design to compensate.
Taking these steps will save you from costly reprints and ensure your transfers look their best.
Choosing the Right Dark Blanks
Not all dark garments are created equal. The fabric composition, weave, and dye can all affect how well a DTF transfer adheres and how it looks after washing. Here's what to look for:
- Fabric content: 100% cotton and cotton/poly blends are the most forgiving. 100% polyester can be tricky because the dye may migrate into the transfer over time, causing discoloration. If you must use polyester, opt for high-quality, dye-sublimation-friendly garments.
- Surface texture: Smooth, tightly woven fabrics provide the best adhesion. Rough or heavily textured fabrics (like some fleece) may require extra pressure or a longer press time.
- Colorfastness: Cheap dark dyes may bleed or fade after washing, affecting the transfer's appearance. Always pre-wash test a sample if you're unsure.
Investing in quality blanks from reputable suppliers will pay off in fewer headaches and happier customers.
Pressing DTF Transfers on Dark Garments: Step-by-Step
Proper pressing is critical for DTF transfers, especially on dark fabrics where adhesion issues are more visible. Follow this proven workflow:
- Pre-press the garment: Use your heat press to remove moisture and wrinkles. Set the temperature to 330°F (165°C) and press for 5-7 seconds with medium pressure. This step is often overlooked but ensures a smooth surface for the transfer.
- Position the transfer: Place the DTF transfer onto the garment with the printed side facing up. If your transfer has a carrier sheet, make sure it's on top.
- Press the transfer: Set your press to 300-320°F (150-160°C) and apply medium to firm pressure for 10-15 seconds. The exact time and temperature may vary depending on the transfer supplier, so always check their recommendations.
- Peel the carrier sheet: Wait for the transfer to cool completely before peeling. For a matte finish, peel cold; for a glossy finish, peel hot. Most DTF transfers are cold-peel.
- Post-press: Cover the transfer with a Teflon sheet or parchment paper and press again for 5-10 seconds to ensure full adhesion and remove any residual carrier residue.
Always do a test press on a scrap garment to dial in your settings.
Troubleshooting Common Issues on Dark Fabrics
Even with careful preparation, you might encounter problems. Here are solutions to the most common DTF issues on dark garments:
- Transfer not adhering: Increase pressure or temperature slightly, or extend press time. Ensure the garment is completely dry before pressing.
- White ink showing through: This can happen if the white underbase is too thin or if the transfer is over-pressed. Check your artwork and reduce pressure.
- Colors look dull: The white underbase may be insufficient. Add a second white layer in your design or increase white ink density in your printer settings.
- Cracking after washing: This indicates poor adhesion. Make sure you're using the correct press parameters and that the garment is properly pre-pressed. Also, advise customers to wash inside out in cold water and avoid harsh detergents.
- Dye migration: On polyester, dye can migrate into the transfer, causing a pinkish hue. Use a low-bleed transfer or a dye-blocking underbase.
Keeping a log of your settings and results will help you quickly diagnose and fix issues.
Finding Reliable DTF Transfers Near You
If you're outsourcing your transfers, quality and consistency are paramount. Searching for dtf transfers near me can lead you to local suppliers who offer fast turnaround and personal service. When evaluating a supplier, ask about their ink quality, film type, and white ink opacity. Request samples and test them on your dark blanks before committing to a large order. A good supplier will stand behind their product and offer guidance on press settings.
Enhancing Durability and Washability
DTF transfers are known for their durability, but you can extend their life with proper care. Here are some tips to pass on to your customers:
- Wait at least 24 hours after pressing before washing.
- Wash inside out in cold water on a gentle cycle.
- Avoid using fabric softeners or bleach.
- Tumble dry on low or hang dry.
- Do not iron directly on the transfer.
Following these guidelines will keep the print looking fresh for years.
Cost Considerations for Dark Garment Printing
While DTF transfers may have a higher per-unit cost than some other methods, they offer savings in other areas: no screens to burn, minimal setup, and the ability to print short runs economically. For dark garments, the elimination of a white underbase screen and the associated setup time can make DTF very competitive, especially for complex, multi-color designs. When pricing your products, factor in the transfer cost, garment cost, labor for pressing, and a profit margin. Many shops find that DTF allows them to offer competitive pricing while maintaining healthy profits.
Frequently Asked Questions
Can I use DTF transfers on 100% polyester dark shirts?
Yes, but you need to be cautious about dye migration. Use a low-bleed DTF transfer or a dye-blocking underbase, and consider a lower press temperature to minimize migration. Always test a sample first.
How do I prevent the white underbase from showing at the edges of my design?
This is often caused by over-pressing or using too much pressure. Reduce pressure and ensure your design has a slight bleed (1-2 pixels) to avoid white halos. Also, make sure the transfer is properly aligned and trimmed.
What is the best way to store DTF transfers before use?
Store them in a cool, dry place away from direct sunlight. Keep them flat or roll them loosely to avoid creases. Avoid humidity, which can affect the film's performance.
How long do DTF transfers last on dark garments?
With proper application and care, DTF transfers can last as long as the garment itself, often 50+ washes. Following wash care instructions is key.
Can I layer DTF transfers on dark fabrics?
Layering is possible but not recommended for beginners. If you must layer, press the bottom layer first, then the top layer, increasing press time slightly. Keep in mind that layering can make the print feel thick.
Mastering DTF transfers on dark garments opens up a world of creative possibilities. With the right techniques and a bit of practice, you'll be producing vibrant, durable prints that your customers will love.